Turtle Creek Nursery Shrub Planting Guide
CHOOSING A PLANT
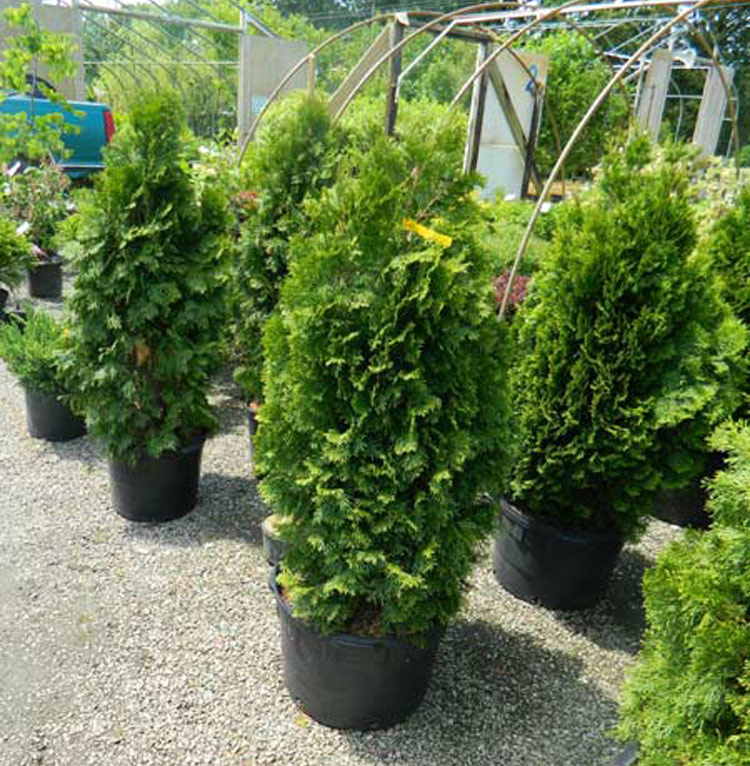
Select a shrub or tree with a healthy, vigorous appearance. Choose one that is not overgrown for its container size. If you can not plant immediately, keep your shrub in a cool place and water often enough to keep the roots moist (every day or two in the summer). Be certain the site for your plant gives adequate room for its eventual size and provides the light and drainage characteristics preferred by that kind of plant. Nurseries grow in a very light soil. This lighter soil allows us to grow high-quality plants in pots because it drains quickly and allows roots to get adequate oxygen. However, we must consider this soil difference when planting, so follow the directions for planting in raised beds or individual holes.
RAISED BEDS
The best choice is to plant in beds that have been tilled to a depth of 10-15″ with a tiller. Spread 2-4″ of peat moss or humus over the bed and till deeply a second time. The final level of the bed should be 2-4″ or more above the surrounding area after the bed has been smoothed and raked. Dig your holes only slightly larger than the root ball and no deeper, if the bed is tilled as deep as your root ball. In a raised bed the top of the root ball should be even with the soil level of the bed.
INDIVIDUAL HOLES
If you are planting in an untilled area, dig your hole twice as wide as the container and half again as deep. For example, if you are planting a 3 gallon container (10″ wide and 10″ deep), dig a hole 20″ wide and 15″ deep. Remove all the soil from the hole and save about 1/2 of it. To give better drainage and increase the oxygen that can reach the roots, you need to add organic humus material to the soil you have saved to fill in the hole. Mix your fill-in dirt with peat moss, compost, or other material such that the mixture is 2/3 dirt and 1/3 humus. Some plants like rhododendron, azaleas, pieris, camellias, dogwoods, roses, and cherries require good drainage and should have a soil mixture of 1/3 dirt, 1/3 humus, and 1/3 perlite for best results. Turtle Creek carries perlite in various sized bags. We also carry organic soil amendment and peat moss. Fill the hole about halfway with this soil mixture and adjust the plant so that the top of the root ball is about 2 ” above ground level. If the area tends to stay wet or the plant is a rhododendron, this level should be 3-4″above ground level.
PLANTING
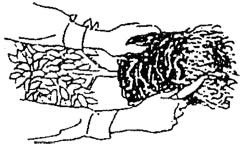
 Carefully remove the plant from the container, keeping the root ball intact. If the roots are coiled on the surface, loosen them with your fingers or a knife so the new roots will quickly grow into the new soil. If the roots are heavily matted at the outside edge, it may be necessary to make 4 to 6 cuts from top to bottom about 2 inches deep into the root ball and gently loosen the roots at the bottom and sides. Put the root ball in the hole and fill with the remaining soil mix, tamping as you go. A plant starter or a root stimulator can be added at this time, if you prefer, but do not use a high nitrogen fertilizer at this time.
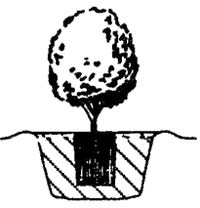
Our Turtle Creek plants will have sufficient nutrients already in their soil to begin good growth. The soil level should be equal to the height it was in the pot, no deeper. Make a water basin around the plant by mounding a circular dike at the edge of the filled area as the illustration shows.
MULCHING AND WATERING
 Cover the entire area 2 to 3 inches deep with pine needles or bark mulch to preserve moisture and keep down weeds. The mulch will need to be replenished in 6-12 months. Fill the basin around the plant with water several time, allowing the water to soak in each time. Keep the roots moist by watering well 3 days after planting and then once a week during the warm season when the plant is growing. Taper off on the water as cold weather approaches. Remember to water during the winter if we get dry. Check the moisture of the soil under the mulch and don’t water if the ground is still moist. Make certain the water is reaching the roots. Watering with an overhead sprinkler wets a large area but not very deeply nor will it get underneath heavy foliage. Hand watering with the hose and a soft nozzle into the basin around the plant is the best watering method especially for newly planted shrubs since the plants have no roots except in the original planting area. Remember, 1 inch of water penetrates 4-5″ in our clay soil and about 7-8″ in our amended soil. So it takes about 2 inches of water to wet the root ball thoroughly. Do not get in the habit of watering every day, except for bedding plants.
FERTILIZING
Turtle Creek recommends Fertilome Tree and Shrub Fertilizer (19-8-10) for all your shrubs and trees. It is a good slow release fertilizer with all the nutrients your plant will need for about 90 days. New plants should be fertilized in the spring. Plants purchased after June from Turtle Creek will usually have already been fed. They will not need fertilizer till the next spring. Early blooming plants, like azaleas, need to be fertilized as they finish blooming. Older shrubs in the landscape should be fed in April and July with the same Fertilome Tree and Shrub Fertilizer. Established trees benefit from feeding earlier than shrubs. Feed trees with the same fertilizer in early March and again in July.
INSECTS AND DISEASE
Check your plants every month during the growing season for problems. If you notice leaves yellowing, spotting, or falling off, you may have a problem. For all insect and disease problems, it is best to bring a sample of the pest and/or plant to TURTLE CREEK and let us recommend a remedy for that specific problem. A preventive insect spraying is often advantageous for ornamental, non-edible plants on an every other month basis with Bonide Systemic Insect Control (an all purpose insecticide). If you have any questions about spraying–PLEASE ASK.
You have done all the necessary work to insure success for your new plants. Don't forget to water every week or so.
Now sit back and enjoy the beauty in your yard.
YOU DESERVE IT!


